If you are not familiar with Conduit, you can get the low down here. If you don’t know about Heroku either, you may be lost? No worries, I am here to help. The short version is Conduit is a tool to move data around and Heroku is an application platform. Ok, let’s get the two hitched up.
Intro
Why might you want to deploy Conduit on Heroku? Heroku provides an easy platform to get an application up and going. It has some free data resources like PostgreSQL as well. This gives you free hosting and data for Conduit!
Methods of Deploy
At a high level, there are two options: deploy Conduit pre-built or build it on Heroku. The advantage of deploying the pre-built version is that dependencies will already be met. The downside is that you can’t change the build configuration. We will touch on why you may want to tweak the build configuration in the “Considerations” Section.
Docker
Using Heroku’s Docker support makes deploying the latest Conduit to Heroku easy as it gathers your dependencies. Docker operates a little bit differently than regular Heroku deploys. You can look over the details here.
You can test this method via this repo.
Go lang Binary
Conduit provides a Go binary as part of each release. The latest can be found here. To deploy a Go binary to Heroku you will need to give Heroku something to detect. For example, we use a package.json file to trick the build process in this repo.
You can test this method via the button below, which is based on version 0.11 of Conduit.

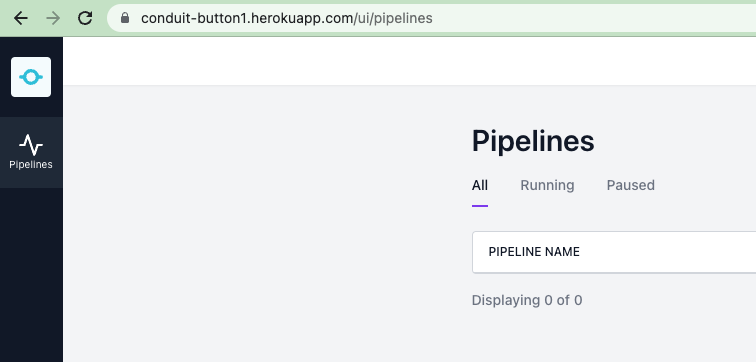
When the deploy is done, you can click View or Manage > View to open the app in the browser. You may need to change the base URL to land on the Admin UI.
The base URL will be:
https://[application-name].herokuapp.com/ui/pipelines
For example:

A Conduit GitHub Repo
You can deploy Conduit to Heroku using the Go buildpack. We provide a test version of this method via the button below. This version does not have the UI enabled for security reasons (see below). To learn more about building Conduit from source you can reference the build instructions.

Considerations
Persisting of Configuration
By default, Conduit stores its configuration on the local disk in conduit.db. Heroku has an ephemeral file system. This means that you will lose your configuration when the file system is “reset” and that happens on every restart. The dynos are restarted every 24 hours and anytime there is a new “release” or deploy. You will want to add a Heroku PostgreSQL addon and use the option below as part of your start command to let Conduit know to store the configs in PostgreSQL.
$ web: ./conduit -db.postgres.connection-string $DATABASE_URLYou can use this Procfile as an example. The deploy buttons above include the addon and this option.
HTTP API Port binding
Heroku web apps bind to $PORT when they startup. By default, Conduit uses port 8080, which will not work. This will need to be set for Conduit via the following flag. Note the leading : .
$ ./conduit -http.address :$PORTConduit HTTP security
The Conduit UI does not currently have authentication in front of it. One option is to build Conduit without the UI (like in the Go repo button above). This would be better for production deploys. If you still want a UI, you have a couple of options.
You can add a buildpack like the nginx buildpack and configure it to provide authentication. Or, in the Procfile you can set your process type to something other than web: e.g. worker: and it will not bind to a port connected to the public internet. As this may work well in Private Spaces (or using an internally routed dyno) it may not be viable in the Common runtime (e.g. free dyno).
gRPC API lack of support
gRPC requires HTTP/2. Heroku does not currently support HTTP/2. So, you will not be able to use the gRPC admin API.
What’s Next?
Now that you have Conduit up and going, you can visit the Conduit.io or view the docs in the repo. And get started building Pipelines!
- PostgreSQL Connector
- Kafka Connector (may require a Private Space)